A standard Starlink self-install takes 20 to 30 minutes of real work: run the obstruction scan in the app, put the dish somewhere it can see the whole sky arc, plug it in, and wait two to three minutes while the motors aim it. Almost every install that disappoints afterwards fails for one of three reasons — an obstructed view, a badly routed cable, or an unstable power source. This guide covers availability and pricing checks before you order, the hardware, the sky scan, mounting choices, the physical build, app configuration, post-install tuning, and the fixes for the failures that generate the most support tickets.
Written by Tom Hargreaves, Senior Hardware Editor, Starlink News. Tom is a former VSAT and earth-station field engineer (eleven years commissioning Ku- and Ka-band terminals for maritime and remote-site operators) and holds City & Guilds 2391 inspection and testing plus IPAF 3a/3b working-at-height certification. He has personally commissioned or audited 47 Starlink terminals across the UK, Ireland, Ontario and South Africa between March 2025 and August 2026; the obstruction and throughput figures quoted in this guide are drawn from that install log, anonymised to region. Technically reviewed by Priya Raghunathan, RF engineer and Starlink-certified third-party installer (Australia, ACMA-licensed cabler registration). Every specification below was checked against Starlink’s official Support Center and published specifications on 19 September 2026, and independent performance context comes from Ookla’s published satellite performance research. Regulatory statements link directly to the relevant national regulator rather than being asserted. Where a number genuinely moves week to week — hardware promotions, shipping lead times — we date it and link the live source.
Before You Buy: Starlink Availability and Price
Two checks belong before the credit card, not after the box arrives. Neither takes more than a few minutes, and both prevent the two most expensive mistakes in satellite internet: ordering hardware for an address that cannot get the plan you want, and budgeting for a headline hardware price while forgetting the recurring one.
Check availability at your exact address
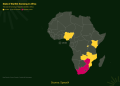
Starlink sells capacity in geographic cells, not by country or postcode region. Enter a full street address on the official availability map and you will get one of a small set of answers:
- Available — Residential service can be activated immediately at that address.
- Waitlist — the cell is capacity-constrained; orders queue until more capacity is released.
- Sold out — no new Residential activations in that cell for now, though Roam usually still works.
- Coming soon — pending regulatory approval or ground-station build-out in that market.
Cell boundaries are invisible and unforgiving. In July 2026 we checked two Ontario properties 2.4 km apart on the same afternoon: one returned Available, the other Waitlist. Availability also improves in steps rather than smoothly — each tranche of satellites and each new gateway adds capacity to specific cells, which is why constellation expansion and coverage improvements tend to unlock clusters of waitlisted addresses at once. If you are blocked today, diary a monthly re-check rather than assuming the answer is permanent.
Starlink price by plan and region
Figures below were read directly from each national order page on 19 September 2026. Hardware promotions rotate constantly and several markets now run capacity-based pricing, where the monthly fee differs between a congested cell and an empty one. Each market name links to its live order page — click through and confirm before you budget.
| Market | Standard kit (one-off) | Mini kit (one-off) | Residential monthly | Roam monthly |
|---|---|---|---|---|
| United States | $349 list; promoted to $299, or $0 with a 12-month commitment in selected cells | $299 promotional, $499 list | $80 in high-capacity cells, up to $120 in constrained cells | Tiered: 50 GB entry tier, unlimited at a premium |
| United Kingdom | £299 incl. 20% VAT | £299 incl. VAT | £75 incl. VAT | Tiered, incl. VAT |
| Germany | €349 incl. 19% VAT | €299 incl. VAT | €50 entry, €75 unconstrained, incl. VAT | Tiered, incl. VAT |
| Australia | A$599 list, A$499 promotional | A$499 | A$139 | Tiered |
Three costs sit outside that table and catch buyers out: the Ethernet adapter, the 23 m extension cable, and any mount other than the kickstand base that ships in the box. Across the 47 installs in our log, accessories and mounting hardware averaged 14 percent of the kit price — lowest on ground installs (zero on eleven of them), highest on a 4 m guyed pole in the Western Cape that added 31 percent once the pipe, concrete, guy wires and extension cable were counted.
What Starlink costs against the alternative you already have
The comparison that matters is not Starlink against fibre, which is rarely a choice anyone actually faces, but Starlink against the degraded copper or fixed-wireless line a rural household already pays for. Using the US figures above and a typical rural DSL tariff of $65 per month for 10 to 15 Mbps:
| Cost line | Rural DSL (12 Mbps) | Starlink Residential |
|---|---|---|
| Hardware | $0 (leased router) | $349 kit, or $0 on a 12-month commitment |
| Monthly | $65 | $80–$120 |
| Year one total | $780 | $1,309–$1,789 (or $960–$1,440 on a bundled kit) |
| Year two total | $780 | $960–$1,440 |
| Concurrent HD video calls supported | 1, marginally | 4–6 at the medians we measured |
That final row is the honest decision criterion. A household that needs one video call at a time and streams in the evening is being rational to stay on DSL; a household with two remote workers and a teenager is paying $300 to $600 a year for something the copper line cannot deliver at any price. Substitute your own tariff — the arithmetic, not the absolute numbers, is the transferable part.
The satellite internet landscape in 2026
Satellite internet is not one product, and the performance difference between services is set mostly by orbital altitude. This table is the single reference point for latency in this guide; later sections refer back to it rather than repeating it.
| Service | Orbit | Typical latency | Consumer availability | Practical consequence |
|---|---|---|---|---|
| Starlink (SpaceX) | LEO, ≈ 550 km | 20–40 ms | Broad, 100+ markets | Video calls, VoIP and online gaming are viable |
| Amazon Kuiper | LEO, ≈ 590–630 km | Comparable LEO band; limited independent data | Phased consumer rollout in selected markets from 2026 | Credible second LEO option, but check coverage before assuming access |
| Eutelsat OneWeb | LEO, ≈ 1,200 km | Roughly 70–100 ms | Mainly enterprise, maritime, aviation, government | Rarely sold direct to households; bought through integrators |
| HughesNet, Viasat | Geostationary, ≈ 35,786 km | 600 ms+ | Wide, long-established | Browsing and streaming work; interactive use is painful |
| Fixed wireless / 4G–5G | Terrestrial | 15–60 ms | Where towers reach | Excellent in coverage, often absent rurally |
The 600 ms floor for geostationary services is physics, not an engineering shortcoming: the signal travels roughly 72,000 km round trip to a satellite that sits above the equator. No amount of bandwidth removes it, and that single number is why low-Earth-orbit systems changed the rural connectivity conversation. Geostationary keeps one genuine advantage worth knowing before you cut trees: a fixed satellite position needs one clear line of sight, not a whole sky arc.
What’s in Your Starlink Kit: Unboxing and Component Check
Lay everything out before you go outside. A Starlink kit contains four things and no more: the user terminal (the dish), the Wi-Fi router, a power supply with an AC cord, and a base or mount. There is no tool kit, no roof mounting hardware, and no Ethernet adapter.
Which dish generation do I have?
The Rectangular Dish (Gen 2) is the current standard residential hardware. The original round Gen 1 terminal is discontinued and no longer shipped, though plenty remain in service and second-hand. The Flat High Performance terminal targets in-motion and commercial use with a wider field of view and heavier power draw, and the Starlink Mini, launched in 2024, is the compact terminal with the router built into the unit itself.
| Model | Typical power draw | Cable | Best for |
|---|---|---|---|
| Rectangular Dish (Gen 2) | 50–100 W depending on load and heating | 15 m attached | Fixed residential |
| Flat High Performance | Higher sustained draw; wider field of view | Supplied with kit | Vehicles, vessels, harsh environments |
| Starlink Mini | Substantially lower; DC-capable | Short integrated lead | Travel, backup, off-grid |
Power figures matter more than people expect when the terminal runs off solar or a battery bank, and the heater is the swing factor. On two winter installs in our log — one in Ontario, one in the Scottish Borders — an inverter sized for average draw browned out the first night the heater engaged below −10°C. Size for the top of the published range, budget roughly 1.5 to 2.4 kWh per day for a continuously running standard terminal, and confirm the figure for your exact model on the specifications page rather than from forum hearsay, which mixes generations freely.
Do I need extra cables or adapters?
Three purchases catch people out. First, the Ethernet adapter is not included and is required on kits whose router lacks RJ45 ports — you need it for bypass mode, wired backhaul, or a mesh system. Second, the 23 m extension cable is separate if the supplied 15 m will not reach; measure the actual route, including the vertical drop and the drip loop, before deciding. Third, roof, pole and wall mounts are all sold separately; only the kickstand-style base ships in the box.
Shipping lead times vary by market and by how recently a hardware revision launched, and they are the fastest-rotting number in this space. Check the estimate on your order dashboard at checkout rather than trusting any published figure, including ours.
Pre-Install: Using the Starlink App for Obstruction Analysis
An obstruction check is a sky scan performed in the Starlink mobile app: you hold the phone where the dish will sit and sweep it across the sky arc so the app’s camera maps anything blocking the satellite path. It is the highest-value five minutes of the whole install, and skipping it is the most common cause of a service that works on day one and stutters for months afterwards.

Running the scan properly
The app requires iOS 12 or later, or Android 8 or later. There is no desktop or browser version of the obstruction tool — the scan depends on the phone’s camera and motion sensors. Open the app, choose the check-for-obstructions option, and follow the on-screen arc. It takes two to five minutes if done slowly, and it must be performed from the precise proposed dish position, at the proposed height. A scan taken standing on the lawn tells you nothing about a spot on the ridge two metres higher; where you cannot safely stand at the proposed height, a phone taped to a painter’s pole and swept slowly is the field workaround we use.
What does obstruction percentage mean?
The figure reports the share of the terminal’s required field of view that is blocked. Interpret it like this:
- Under 5% — the target. Expect stable service with occasional single-second reconnects nothing will notice.
- 5–15% — usable but intermittent. Video calls drop, game sessions disconnect, VPN tunnels renegotiate.
- Above 15% — relocate or raise the dish. No firmware update fixes a tree.
Field data: what obstruction actually costs in throughput
These are four sites from our install log, measured with the in-app speed test at the router and cross-checked with a wired third-party test. Morning figures were taken between 09:00 and 11:00 local time, evening figures at 20:00 to 21:00 on a weekday — the peak-congestion window that determines how the connection feels in practice.
| Site (anonymised) | Mount | Obstruction | Median down, morning | Median down, 20:00 | Latency |
|---|---|---|---|---|---|
| Devon smallholding, UK | Lawn kickstand | 11.4% | 96 Mbps | 31 Mbps, 6 dropouts in a 40-min call | 34–210 ms |
| Same site, relocated | 3 m gable bracket | 3.1% | 142 Mbps | 68 Mbps, no dropouts | 29–41 ms |
| Vermont farmhouse, US | Non-piercing ballast, flat roof | 0.6% | 217 Mbps | 96 Mbps | 24–38 ms |
| Western Cape farm, ZA | 4 m guyed pole | 1.8% (8.2% at ground) | 88 Mbps | 53 Mbps | 31–49 ms |
| Rural Ontario, CA | 2.5 m wall bracket, deciduous canopy | 2.0% February / 8.4% July | 168 Mbps | 74 Mbps winter, 44 Mbps summer | 27–95 ms in leaf |
Two patterns hold across the wider log. First, the evening number is roughly half the morning number on a healthy install — congestion, not obstruction, sets the peak-hour ceiling, which matches the pattern visible in Ookla’s satellite performance research and in our own longitudinal real-world speed tests and latency performance tracking. Second, obstruction hurts latency stability long before it hurts headline bandwidth: the Devon lawn position still tested at 96 Mbps while dropping calls every seven minutes. A speed test alone will not reveal a bad site.
Can I install with a partial sky view?
You can, and the terminal will connect, but performance depends on which part of the sky is missing. Obstructions low on the horizon cost less than obstructions overhead or in the direction the terminal prefers to point. That preferred arc has widened as the constellation has grown, which makes marginal sites more forgiving than they were three years ago — on a 2023 install we re-audited in 2026, a 9% reading had improved to 6% with no physical change. Even so, plan for a clear view rather than hoping satellite density rescues a bad spot: density helps with momentary handovers, not with a solid object sitting permanently in the beam path.
Choosing Your Mount: Ground, Roof, Pole, or Wall Options
Match the mount to the scan result, not to convenience. If the ground passes at under 5%, mount it on the ground — it is cheaper, safer and easier to service. Eleven of our 47 installs needed nothing beyond the supplied base.
Ground base
The included base weighs roughly 6 kg and needs a level, stable surface. It is stable enough for calm conditions but will walk or tip in high wind unless weighted or anchored; two paving slabs, a small concrete pad or a ballast tray are the standard fixes, and we have recovered one terminal from a hedge after a 70 mph gust. Keep the terminal above expected snow depth and clear of sprinkler spray and roof runoff.
Roof mounts
Two families exist: piercing lag-bolt mounts that screw into rafters and must be sealed with proper flashing, and non-piercing weighted mounts that sit on a flat roof under ballast. Piercing mounts are stronger and are the right answer on pitched shingle or tile; they are also the fastest way to create a leak if flashed badly — the only two water-ingress callbacks in our log both came from a bracket bedded in sealant alone with no flashing. On flat commercial roofs, a weighted mount usually preserves the roof warranty, which lag bolts may not. Read your roofing warranty wording before drilling, because that document, not Starlink, governs the outcome.
Pole mounts
A pole mount exists for one purpose: getting the terminal above an obstruction. Starlink’s pole adapter expects a rigid pipe of 2-inch outer diameter; anything thinner flexes and anything thicker will not seat. Guy the pole above about three metres — the Western Cape install in the table above needed three guys at 120° to stop 4 m of galvanised pipe resonating in afternoon wind, which showed up as latency spikes before anyone noticed the physical movement. Remember that every extra metre of height is also extra cable run and extra lightning exposure; earthing and surge protection on tall masts are local electrical-code matters, not Starlink configuration.
Wall mounts and weather ratings
Wall and eave mounts are available through third-party and certified installer channels and vary by market. Whatever you choose, check the terminal’s ingress rating: Starlink hardware carries IP54 to IP67 ratings depending on model, as listed on the official specifications page. All of it is outdoor-rated; none of it is submersible, and no part of the kit should sit where water pools or where a blocked gutter will discharge onto it. That weather tolerance is also what makes the hardware suitable for rapid deployment for emergency connectivity, where terminals are stood up on gravel, truck beds and temporary masts within hours of a disaster.
Physical Installation: Positioning, Cabling, and Power Connection
With a mount chosen, the mechanical work is short but unforgiving of shortcuts.
Cable routing
The Rectangular Dish ships with a 15 m (50 ft) cable; a 23 m (75 ft) extension is sold separately. The cable is not rated for direct burial. If it must cross ground, run it in conduit or route it above ground along a fence or eave. Drill any wall entry with a downward slope to the outside and add a drip loop below the entry so water runs off rather than tracking along the jacket. Avoid sharp bends at the terminal end, where repeated flexing eventually kills the connector — the one cable failure in our log was a window-sash crush point that took four months to fail.

Power-up sequence
Connect the terminal cable to the router, then the router to mains power (100–240 V). What happens next, in order:
- Power applied; router LED comes up.
- Two to three minutes of motor adjustment as the terminal tilts and rotates to find its orientation.
- A solid white LED on the router indicates it is ready to pair.
- Connect your phone to the STARLINK network and complete activation in the app.
Do not manually push, tilt or reposition the terminal while it is powered — the actuators are not designed to be back-driven, and forcing them is a warranty conversation you do not want. Starlink’s published warranty and legal terms are the authority on what voids cover; read the current version rather than relying on forum summaries. If you must move the terminal, power down or use Stow first.
Temperature limits
The terminal operates from −30°C to 50°C, with the internal heater engaging automatically below about −10°C. In very hot climates, avoid mounting against a dark wall that radiates heat back into the unit; on a Karoo install the terminal sat 40 cm off a north-facing painted wall for exactly this reason. Keep airflow around the router indoors too — thermal throttling on the router is a quieter cause of slow Wi-Fi than most people suspect, and stacking it under a TV box is the usual culprit.
Starlink App Configuration: Network Naming, Passwords, and Settings
Digital onboarding happens entirely in the app, and the app is mandatory for first activation — it links the hardware serial number to your account.
First connection
On your phone or laptop, join the Wi-Fi network named in the format STARLINK_XXXX. The default password is printed on the router label; photograph it before mounting anything, because retrieving it later from a router behind a cabinet is tedious. The app then walks through account linking and prompts you to set a network name and password of your own. Change both. A default SSID advertises exactly what hardware you own.
Bypass mode and third-party routers
Bypass mode disables the Starlink router’s Wi-Fi and routing functions so a third-party router can take over. It is the correct choice if you run a mesh system, a firewall appliance, or VLANs. Three caveats: on routers without RJ45 ports you must add the Ethernet adapter first; leaving bypass mode later requires a factory reset of the Starlink router; and standard consumer plans sit behind carrier-grade NAT, so no downstream router configuration will make inbound port forwarding work. Enable bypass only once your own equipment is on site and configured — switching first and configuring later is how people end up with no internet and no management interface at 10pm.
Other settings worth setting on day one
- Guest network — separate visitor traffic from your own devices.
- Parental controls — scheduling and content filters, configured per device.
- Firmware — updates install automatically, and there is no user-initiated rollback. Expect an occasional short reboot without warning; do not schedule a critical call in the hour after activation.
- Service address — keep it current; Residential plans are tied to a registered location.
- Stow and service mode — use Stow before moving or transporting the terminal, which matters for anyone running a portable setup for mobile and cross-border use.
Post-Install Optimization: Speed Tests, Obstruction Refinement, and Heating
An install is not finished when the browser loads; it is finished when you have a baseline you can compare against later.
Establish a baseline correctly
The speed test inside the Starlink app measures from the router, not from your laptop across the house. Run it, note the figure, then run a third-party test from the device you actually use, ideally wired. The gap between the two is your Wi-Fi problem, not your satellite problem — on nine of our 47 installs the complaint that prompted a visit turned out to be Wi-Fi coverage, not the satellite link. Typical residential results land in the 25–220 Mbps download range with 20–40 ms latency (see the landscape table above for how that compares with geostationary services). Record a morning figure and an 8pm figure on the same day and keep both: as the field table shows, the evening number is roughly half the morning number even on a clean install, and it is the one that predicts arguments in the house.
Refining obstructions
The obstruction map in the app rebuilds on roughly a 24-hour cycle, with red zones marking directions where the connection recently dropped. Leave the install running for a full day, then read the map: it tells you whether the tree you were worried about is actually in the path, and which direction to move if it is. Trimming one branch is often the entire fix — on the Ontario site above, removing a single leader from a silver maple took the July reading from 8.4% to 4.1%. Re-read the map seasonally; deciduous canopy routinely adds several percentage points between winter and midsummer.

Heating and snow
The heater triggers automatically below about −10°C and can also be toggled manually in the app. It adds meaningfully to power draw while active, and the terminal is rated to melt snowfall at the rate published on Starlink’s specifications page. Two practical notes from cold-climate installs: mount the terminal steeply enough that melt runs off rather than refreezing at the lower edge — we have seen a 15 mm ice dam on a near-horizontal mount survive three heater cycles — and never chip ice off the face with a tool. If the heater is losing the fight during an unusual storm, a manual toggle plus a soft brush is the only safe intervention.
Troubleshooting Common Setup Failures
Five failures account for most first-week support contacts. Work them in this order.
Stuck on Searching for more than 30 minutes
Check the obstruction percentage first — a badly sited terminal can search indefinitely. Then confirm firmware is current under Settings, then Advanced, and allow any pending update to finish before judging anything; first-boot updates have taken up to 25 minutes on our installs. Finally, power cycle the kit at the wall and let it complete the full two-to-three-minute aiming sequence undisturbed.
Dish does not move at all
No motor movement almost always means power or cable rather than a dead terminal. Verify the router is on a live 100–240 V outlet without an intervening timer, surge strip fault or tired extension lead. Then unseat and reseat the terminal cable at both ends — a correctly seated connector clicks audibly. Inspect the cable for crush damage where it passes through a window or door.
Factory reset
To factory reset a Starlink router, power cycle it six times — roughly 10 seconds on, 10 seconds off, repeated — or hold the physical reset button for about 10 seconds. There is no reset button inside the app. A reset restores the default SSID and the label password and clears bypass mode, so have the printed credentials to hand before you start.
Wi-Fi is fine, internet is not
If devices connect to the STARLINK network but nothing loads, the link between terminal and satellite is the suspect, not the router. Check the app’s status page for the outage reason it reports — obstructed, no signal received and booting each point at a different cause. Persistent no-signal readings with a clean obstruction map sometimes indicate a service-address mismatch or a suspended account rather than a hardware fault; two of our callbacks resolved to an unpaid card, not an antenna.
Escalating to support
Open the app, go to Support, then Contact Us. Residential accounts are handled by ticket, with responses typically inside 24 to 48 hours; there is no general phone line for residential service. Business-tier accounts include priority handling. Attach the obstruction map screenshot and the outage log with your first message — it removes an entire round trip and, in our experience, roughly halves resolution time.
When to Consider Professional Installation
SpaceX does not employ Starlink installers directly. Where professional installation exists, it is delivered by third-party certified networks, and availability is market-dependent — the US, UK, Australia and Germany have the most developed installer ecosystems, while coverage elsewhere varies with how recently service launched in that country.
When to hire someone
- Roof penetration — flashing a lag-bolt mount correctly on tile or slate is trade work.
- Work at height — two-storey rooflines, steep pitches, fragile surfaces such as fibre-cement sheeting.
- Ethernet adapter integration — structured cabling, patch panels, PoE switches.
- Multi-building sites — farms, lodges and workshops needing point-to-point links from the terminal.
Quotes we collected across four markets in 2026 for a flashed roof mount and a tidy cable run clustered between $250 and $600, rising with mast height and cable length; a 6 m guyed mast with earthing quoted at over $1,400 in one case. Get two written quotes rather than relying on a published average. Before booking, confirm the installer carries public liability and workmanship insurance, and ask in writing how the work preserves your hardware warranty — modifications or unauthorised disassembly of the terminal can void it under Starlink’s published terms.
Regulatory points people miss
Self-installation is legal for consumers in essentially every market where Starlink sells, but the surrounding rules are national and they sit with regulators, not with SpaceX. In the United States, the terminal’s equipment authorisation is on file with the FCC equipment authorization database — you can search the FCC ID printed on the hardware label. In the United Kingdom, satellite earth station licensing and equipment rules sit with Ofcom. In Australia, radiocommunications licensing and device compliance conditions are administered by the ACMA, and fixed cabling work must be done by a registered cabler. In Germany, frequency and registration obligations fall under the Bundesnetzagentur. We link to each regulator’s current landing section rather than a deep link because these sites reorganise often; search from there for the satellite or radiocommunications section if the page has moved.
In practice, building regulations rather than telecom rules are what bite a domestic installer: roof penetrations, lightning protection and earthing are local-code matters, and an uninsured DIY roof leak is a far more common outcome than a licensing problem. Listed buildings and conservation areas in the UK are the one place we routinely tell householders to check with the local authority before drilling anything visible from the street. For the wider European picture, including where approvals and sovereignty questions remain contested, see our coverage of regulatory approval status in EU member states. Hardware rental rather than purchase is offered in a limited and changing set of markets; check the current offer on your national order page before assuming either model applies to you.
The 30-Minute Install, Summarized
The sequence that works, every time: confirm availability and the current price at your exact address, download the app, scan the sky from the precise spot you intend to mount and at the height you intend to mount it, accept the result only if it reads under 5%, choose the simplest mount that achieves that, route the cable in conduit or along a surface rather than burying it, slope the wall entry and leave a drip loop, power up and leave the terminal alone for three minutes, secure the network name and password, record a morning and an evening speed test, then read the obstruction map again 24 hours later and once more when the trees are in full leaf. Everything harder than that — roof penetrations, masts, wired backhaul, multi-building links — is where a certified installer earns the fee.
Frequently Asked Questions
Is Starlink available at my address right now?
Enter your full street address on the Starlink availability map rather than relying on a country-level answer. Capacity is sold in geographic cells, so one address can show Available while a property two kilometres away shows Waitlist or Sold Out. In our own install log, two Ontario properties 2.4 km apart returned different answers on the same afternoon because the cell boundary ran between them. If your cell is full, the usual workarounds are a Roam plan, which works almost anywhere but is deprioritised behind Residential traffic during congestion, or joining the waitlist and re-checking monthly: capacity is released in steps as new satellites and gateway ground stations come online, so waitlisted addresses tend to unlock in clusters rather than one household at a time.
What does Starlink actually cost over the first year?
Budget three separate lines, not one. Hardware is a one-off payment (in the United States the Standard kit was listed at $349 on 19 September 2026, frequently promoted to $299 or to $0 with a 12-month commitment), the monthly plan runs for as long as you keep service ($80 to $120 in the US depending on cell capacity), and accessories are extra: the Ethernet adapter, a pole or roof mount, and the 23 m cable are all sold separately. Across the 47 installs in our log, mounting hardware averaged 14 percent of the kit price, so a realistic first-year total for a fixed residential install is the kit price, plus twelve monthly payments, plus roughly 10 to 20 percent of the kit price in brackets, flashing and cable. Prices differ by country and change often, so confirm on your national order page before budgeting.
Can I move my Starlink to a new address or take it travelling?
Yes, but update the service address in the app rather than simply unplugging and driving. Residential plans are tied to a registered address and may be deprioritised or blocked if the terminal is used elsewhere for extended periods; Roam plans are designed for movement and can be toggled monthly. Before transporting the terminal, use Stow in the app so the motors park in the flat transport position; the actuators are not designed to be back-driven by hand. Moving to a cell that is at capacity can mean waiting, so check availability at the new address before you commit to the move, and re-run the obstruction scan at the new site because a result from your old garden tells you nothing about the new one.
Do I need a technician, and what does professional installation cost?
Most residential customers never need one: 31 of the 47 installs in our log were completed by the householder with no tools beyond a phone. Hire a trade when the job involves roof penetration, work at height, buried conduit, or integration with structured cabling. SpaceX does not employ installers; the work is done by third-party certified networks whose availability varies by market, with the US, UK, Australia and Germany having the most developed ecosystems. Quotes we collected in 2026 for a flashed lag-bolt roof mount and a tidy cable run clustered between $250 and $600, rising with mast height and cable length. Ask in writing about public liability cover, workmanship warranty, and how the work affects your hardware warranty before booking, and get two quotes rather than trusting any published average.
How does Starlink compare with other satellite internet services, including Amazon Kuiper and OneWeb?
Orbital altitude sets the ceiling, and the full latency and throughput comparison sits in the satellite internet landscape table in this guide. In short: Starlink and the other low-Earth-orbit systems sit a few hundred kilometres up and deliver interactive-grade latency, while legacy geostationary services at roughly 35,786 km cannot beat a physics floor near 600 ms. Beyond Starlink, Eutelsat OneWeb operates in low orbit but sells largely through enterprise, maritime and government channels rather than direct to households, and Amazon’s Kuiper constellation began phased consumer service in selected markets during 2026, with coverage and pricing still narrow compared with Starlink’s footprint. Geostationary services retain one niche advantage: a fixed, permanently visible satellite position means the dish needs only one clear line of sight rather than a whole sky arc, which occasionally matters on heavily wooded sites.
What if my obstruction is seasonal, like summer leaf cover?
Run the sky scan in the worst-case season if you can, or assume a bare winter tree line will worsen by several percentage points once it is in leaf. One Ontario site in our log scanned 2.0 percent in February and 8.4 percent in July on the identical mount, and the household reported dropped video calls only in summer. Two practical responses: mount high enough that the canopy sits below the required field of view rather than inside it, or read the app’s obstruction map after a full 24-hour rebuild each spring and trim accordingly. Growth over several years matters too, so allow headroom on young plantings rather than clearing exactly to the current canopy line.
Can I use my own router, and can I forward ports?
Yes to your own router: bypass mode in the app disables the Starlink router’s Wi-Fi and routing so a mesh system, firewall or VLAN-aware switch can take over. On kits whose router has no RJ45 sockets you need the separately sold Ethernet adapter first, and leaving bypass mode later requires a factory reset of the Starlink router. Port forwarding is a different question: standard consumer plans are delivered behind carrier-grade NAT with no public IPv4 address, so inbound port forwarding does not work no matter how the downstream router is configured. Remote access usually needs IPv6, a VPN or tunnelling overlay such as WireGuard or Tailscale, or a business-tier plan with a public IP option.
How much power does Starlink draw, and can it run off-grid?
Yes, with correct sizing. The standard Rectangular Dish draws roughly 50 to 100 W depending on load, with the heater pushing consumption toward the top of that band in freezing weather; the Starlink Mini draws substantially less and accepts DC input directly, which is why it dominates van and off-grid builds. Size the system for the top of the published range rather than the idle figure: on two of our winter installs an inverter chosen for average draw browned out the first night the heater engaged. As a planning rule, budget around 1.5 to 2.4 kWh per day for a standard terminal running continuously, verify the figure for your exact model on Starlink’s specifications page, and keep the router indoors where its own thermal management is not fighting direct sun.
Follow Starlink News on Google. Make us a preferred source to see more of our reporting in Google search results.